Wednesday, December 28, 2011

Share a Story winners!

Thanks to all of you for sharing your stories. I loved reading them. I decided I love an interactive blog! Anyway, I wish I had enough for all of you, but since I don't, I had my son pick 4 winners. Since I have no idea how to use random.org to choose multiple winners, I was forced to revert to the old fashioned method of writing numbers on bits of paper and having someone choose. That someone was my home from college son, Danny. So, thanks to him, the following ladies will be receiving a twine sampler of 9 colors:


"missstamper said...


When my oldest daughter was a toddler some mornings her dad would be the one to get her ready and take her to daycare. He tried to fix her hair, but to no avail. The daycare ladies were so nice, because when I came to pick her up, her hair would be nicely braided!"
missstamper....I need a way to contact you! Send me an email address or let me know if you are on the Cricut message board and I can contact you there!
"Teresa said...
Okay this is my second attempt at typing out this story...The first one got eaten by my iPad!! LOL!

My story also has to do with decorating the Christmas tree and some lessons learned this year. Decorating the tree at my house is a family affair, including grandkids. We decorated really late this year due to my being out of town the first week of December due to a death on my side of the family. So we decorated this past week. I learned three major lessons through all of this. First, we usually decorate with all the grandkids. Due to the lateness and just lack of being able to get it all together the older two grandchildren were not there. Well since they do not really seem to be into it usually anyhow I didn't think that really mattered much until this past weekend when the oldest (almost 15) said "where is my ornament?" and that made me think that no matter how old or how uninvolved they may seem a tradition is still important.

Second, as we were decorating the tree I pulled out what I thought was an old and "lost its usefulness" ornament. I stated I don't think I am going to put this one on the tree...my 29 y/o daughter looked at me and replied "well I made that and I think it needs to go on the tree" so second lesson learned no matter how old the child is or how much I think an ornament has lost its luster it is still important.

The final lesson I learned this Christmas season I learned while sitting at the bedside of my dying aunt. I am a huge procrastinator and the reason we did not decorate the tree is cause I kept putting it off. Well being with family the week of my aunt's final days and then her viewing and funeral made me realize that it is really important to make time to do things with family. So no more procrastinating about doing things. That tree was up the weekend after Thanksgiving and I had the whole week off school but needed time to recoup so did not want to bother doing all that. Well, God did not promise us tomorrow so I plan on doing things with my children and grandchildren while I can and not putting things off anymore.

Sorry for rambling on...but those are the three main lessons I learned this Christmas season...so far anyway."

"BethanyR said...
My favorite Christmas story is about my middle son. When he was in fifth grade his social studies teacher asked the kids, when they returned back to school after Christmas break, to write about their family holiday traditions. Food seems to be important to my son Jon because from early on whenever he had to write about his family it mentioned food. One of our traditions is on Christmas day I make crepes for breakfast. Jon didn't know how to spell crepes but he gave it his best shot. His teacher called him up to her desk to ask him what he was trying to say as his essay read...."My mom makes crap for Christmas breakfast. She makes the best craps in the world, beside my presents her crap is my favorite part of Christmas day". I have the essay and it is framed!..."

"Scrappin Dhilly said...
My favorite Christmas story was when my youngest of two children was 9 years old and questioning whether or not Santa really exists. I have always told my kids that "You must believe to receive". Well, one day when Mom isn't around, my 9 year old son asks his Dad, "is Santa real?" My husband responds, "no". He doesn't bother to play along or anything, plain and simple, "no". As soon as I get home my son bursts out, "you have been lying to me, Santa is not real, and you even lied about the Tooth Fairy and the Easter Bunny, you're a liar!" I was totally heart broken, my poor baby. That was about four years ago, I still tell my kids, "you have to believe to receive!" Happy holidays and thanks for the fun giveaway!'

Congratulations, ladies! I will be contacting you for your addresses. Oh, here's a picture of the 4 twine samples....one will be coming your way very soon!

Have fun with your twine!
Carole

Wednesday, December 21, 2011

Yikes! It's almost Christmas! Share a story....

Hi, all! Carole here. I have no projects to post. Well I have projects to post, I just have not taken pictures of them, and considering how behind I am on my Christmas preparations, I am probably NOT going to get to it any time soon. Look for one of my New Year's Resolutions to be "Do Not Neglect My Personal Blog".

Even though I am behind on my Christmas to do list, I had to take the time to share a "Things that make you go hmmmmmm" with you all. A few weeks ago my dear husband decided to put up the Christmas tree. Thank goodness or we probably would not have a tree up yet. He also decorated it with ornaments he found in the Christmas box. Now, we have enough ornaments to decorate at least 3 trees, but given how bad I am about having time to decorate at all, we usually only decorate one tree. But I digress.

While examining his fine work I could not help but notice that somehow he managed to find the ugliest, least sentimental of all our ornaments and decorate the tree with them. In other words, he used the "reject" box. Well, I couldn't tell him that after the effort he put into it, but tonight I will be adding all the sentimental ornaments. The ones picked out by the kids, given to us in ornament exchanges or from co-workers and friends I've long lost touch with, and of course the handmade ornaments made by our children while in school.

His choosing the rejected box of ornaments reminded me of how he would do something similar long ago. When left to take care of our daughter, in the days before she could dress herself, he somehow always managed to find the stained shirt and the one size too small pants/shorts/skirt to dress her in.  Of course, they didn't match either. I would come home and wonder how the heck he even found the outfit, knowing it was in the back of the drawer, under tons of newer, nicer clothes. He had to WORK hard to find those crappy clothes! Anyway, something that annoyed me terribly back then has turned into a story that I hold dear to my heart. Because really, he had no clue the outfit was hideous. He thought she looked beautiful in it.

Share a story.....and I'll give you a sampler of twine. I only have 4 so if more than 4 people post, I'll pick names randomly. I guess I'll give you all some time. How about until Wednesday, December 28th? Around 8:00 pm That's when I'll choose. Oh, and leave a way for me to get a hold of you, please!

Merry Christmas!

Wednesday, December 14, 2011

Starbucks Gift card winner

Hi, all. I forgot I was supposed to pick the random winner of my Holiday Blog Hop prize last night. Sorry about that. The prize is a $10 Starbucks gift card. The winner, as chosen by Random.org is

True Random Number Generator  19This is so funny because 19 is my lucky number! And today it is also the lucky number for:


Congatulations, marg0006! I will send this to you as soon as I get your mailing address!


marg0006 said...


This is such a cute wreath. Thanks for such a creative and fun idea.
marg0006@verizon.net


Powered by RANDOM.OR

Sunday, December 11, 2011

Tissue Paper Candle

Happy Sunday! Not sure why I said that because after Sunday comes Monday and I'm so NOT ready for the new work week to begin....yet. Today my Tissue Paper Candle is being featured at TheBugBytes. I hope you will take a peek.

Saturday, December 10, 2011

Holiday Blog Hop-Paper wreath

Happy Holidays to all of you Blog Hoppers! Carole here, and you are On my craft room wall. You should have hopped here from Jen's blog. If you started here, you should go back to The BugBytes  and start at the beginning. There are lots of great projects and prizes being shared and I would hate for you to miss any of them!

Pam - http://www.thebugbytes.com/
Jeannie - http://nonnasscraps.blogspot.com/
Jen - http://3catsandabug.blogspot.com/
Carole - http://www.onmycraftroomwall.blogspot.com/   YOU ARE HERE
Lisa Brooks - http://thejourneyoflisaslife.blogspot.com
Audrey - http://cuteandsome.blogspot.com/
Mila - http://milamemories.blogspot.com/
Sheila aka sassylady - http://shesasassylady.blogspot.com/
Elizabeth - http://217creations.blogspot.com/
Kelly Millet - http://www.kamscraftyplace.blogspot.com
Dayna Sabrina - http://www.sabrioletdesigns.blogspot.com/
Lori - http://www.scrappinmystressaway.blogspot.com
Denine Vajja - http://pumpkinspiceblog.blogspot.com/
Melissa - www.melissamade2.blogspot.com
Allison - http://goodybagdiva.blogspot.com/


Now on to my very simple project. 


I am in love with making these paper wreaths!


Now, I must confess, this is the only picture of my project I did not delete. Well, I did delete it but luckily I still have the one I sent to Pam (thank goodness you asked for one, Pam!) I took at least 8 pictures last week of this process and when I just went to upload them to this post, I noticed that I did not save them to my computer and deleted them from my camera. Considering I rarely delete photos from my camera, the irony is not lost on me. Oh well, this is such an easy project I should be able to adequately describe the process.


Supplies:
8" styrofoam wreath (I used the green hard styrofoam)
straight pins
12 X 12 double sided paper or cardstock (about 3 or 4 sheets)
ribbon-18" length
mini ornament balls
pen, pencil or something similar


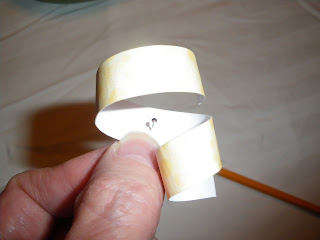
Cut paper into 1/2" strips. Then cut each strip in half. You will have a pile of 6" X 1/2" paper strips. Take a paper strip and wrap it completely around a pen or pencil. After wrapping the entire strip around the pencil, let it drop from the pencil. The paper should be curly. Do this with at least half of your cut paper strips. Once you have a nice pile of curls, you are ready to start pinning them to your foam wreath. First, tie your piece of ribbon at the top of the wreath to create a hanger. Next, push a stick pin through the center of a paper curl and pin it to the styrofoam wreath. I always start at the top of the wreath, by the ribbon hanger and then work my way around the wreath, clockwise. I do not cover the back of the wreath as it will be against a wall or flat surface once I hang it. Curl more paper strips as needed. Once you go completely around the wreath, give it a good once over and fill in any spots you feel you need to. You can make the wreath as full of paper curls as you want. The look is entirely yours.


OK, I've decided I must have pictures to share....luckily I can recreate a few to help explain the process.....


Tie ribbon at top of wreath

Curl paper around pencil

Curled paper 

Place pin through paper

Start by placing paper curls at top of wreath and keep adding working around wreath in clockwise direction

Once you are done with attaching the paper curls, you can add the decorative ornaments. I used a 12 cluster pack of ornaments I got on sale at Michael's for less than $2.00. I separated the ornaments, which were each attached to a long wire. I cut the wire in half (it was too long) and stuck the wire into the styrofoam wreath in various spots around the circle. At times it was difficult to poke the wire through the hard styrofoam, for these times I first poked a hole with a straight pin and then stuck the bulb wire into the styrofoam. Once again, here is the finished project:


This is a simple and quick project to complete. If shouldn't take more than a few hours from start to finish, and that's if you are chatting with friends and snacking during the process. Little skill is required and it is a nice project to do with friends who may be new to the crafting world.

Now, for my giveaway. If you are a follower of my blog and you leave a comment here, you will be entered in a random drawing to receive  a $10 Starbucks gift card. Who can't use a little extra caffeine during the holiday season? The drawing will be held at 9:00 PM on Tuesday, December 13th.

Next up on the blog hop is a really good friend and someone I am lucky enough to get to craft with frequently, Lisa Brooks. Please hop on over to her blog Rather B Scrappin and see what she has to share with all of you.

Happy Holidays!
Carole


Sunday, November 13, 2011

Etched mirrored ornaments

Hello, my lovelies! Today I am featured on The BugBytes blog. I hope you will hop over there and become a follower. Pam is one of the sweetest people I've had the pleasure of meeting through my love of crafting and she has some of the most amazing Design Teams. I am so honored to be part of this group. Now, on to my project, which I created for an ornament swap I participated in just yesterday. I hope you will enjoy!

I purchased this pack of mirrored ornaments at Michaels.


I removed the silver cord to make it easier to etch.

Next I pulled out my Cricut vinyl and transfer tape. A tip about vinyl. I once read on Diane Campbell's (Capadia Designs) blog that she thought Cricut vinyl worked best for etching. And I must agree. Resist the tremendous urge you will have to use less expensive vinyl. Etching is not something you can un-do and I have found that I get better results with the Cricut vinyl.

After pulling out this brushed silver vinyl, it seemed the texture was different so I went and pulled out some blue instead. It was a wise decision. Not only was the texture what I needed, it showed up better on the mirrored surface.

I laid out my design on my Gypsy using the following Cricut cartridge cuts and sizes:

George and Basic Shapes-Circle cut at 2.49" using Silhouette feature
Winter Lace-snowflake cut at .87"
Birthday Cake-2011 cut at 1.00"

I welded the star, the "2" and a "1" to the inside of the circle. Not sure if I was going to like the negative or the positive of the design better, I decided to etch both before deciding. I had 6 ornaments and only needed 5 for the exchange so I felt I had one extra to test.

Here I am applying a nice thick coat of etching cream. I let this cream sit on it for like 30 minutes because I was busy doing something (watching tv). I rinsed off the cream under warm running water and wiped dry with a paper towel.

Next the big reveal! I pulled off the vinyl and discarded it.
I decided I liked both the negative and positive etched designs so I did the rest of my ornaments using both. Which saved me lots of time and vinyl by using all the cuts.

By the way, I placed the circle slightly off center and liked the effect a lot. Here are my 6 etched mirrored ornaments.

I didn't just want the front to be pretty, so I decided I needed to decorate the back of the ornament as well. Using white smooth Bazill cardstock, I cut 2 snowflake doily cuts from the Martha Stewart Elegant Cake Art cartridge at 2.75" and 1 snowflake doily shadow cut also at 2.75"
I ran one of the doily cuts and the shadow cut through the Cuttlebug using the Swiss Dots embossing folder.

I adhered the embossed snowflake doily to the unembossed snowflake doily using pop dots. I adhered these two layers to the shadow (unembossed side) also using pop dots.

 I centered the ornament on the front side of the shadow cut and using a pencil, marked the hole.
 Next I punched a hole through all three layers of cardstock.
 Using my hot glue gun I adhered the mirrored ornament to the cardstock.
I threaded a lavendar organza ribbon through the hole and tied a knot.  I added a lavendar sparkly adhesive raindot to the center of the snowflake.

Here is the back of the ornament:

Here is the front of the negative etched ornament.
Thank you for stopping by!

Carole 

Sunday, November 6, 2011

Paper Craft Weekend Challenge - product challenge

My second post of the weekend is also for the Paper Craft Weekend Challenge. Caroline's challenge was to use beads. I have a very limited supply of beads, but I did buy these rochaille beads several years ago in the hopes of using  them for a Christmas project. Well, that never happened,  however, I am working on some tags for a tag swap at an event I am attending next week. I thought, how can I incorporate these beads into these tags? A simple solution was to add a row of them to the tag, and thread a few on some white twine. Simple, but I like it enough to add this embellishment to all the tags I made. The cardstock is from My Mind's Eye, Colorful Christmas collection (this was from a couple years ago).Beads from Westrim. I used Avery Shipping tags purchased at Office Max for the base. I'm liking these! Oh, I piped a line of Aileen's craft glue to the tags and placed the beads into the glue. I threaded the beads onto very thin white twine and tied knots on either side of the beads. Easy peasy.


Fall Card for Paper Craft Weekend Challenge blog

Happy Fallback Sunday! I love the weekend when we get to put our clocks back an hour. I just love getting that extra weekend hour. Anyway, this is a quick post so I can link my project to the Paper Craft Weekend challenge sketch challenge this weekend. I used Allison's card sketch for this project.


Recipe:
Cardstock: Bazill Swiss Dots (yellow), DCWV Harvest Gathering Mat stack
Cuttlebug Die cut/Embossing folder combo: Fall Leaf
Happy  Thanksgiving Stamp: Inkadinkadoo
Grateful stamp:Studio G
Other assorted supplies: Corner chompers (ticket stub, 1/4 rounded edge); Stampin Up Ink: Soft suede and Early Espresso; twine (the Twinery), eyelets (provocraft)


Paper Craft Weekend Challenge

Sunday, October 23, 2011

Winner of My Blog Hop Prize

Hi, all! Thanks for stopping by my Fall Blog Hop entry. I was a little late in picking the winner as I got sidetracked watching a tv show. Anyhow, without further adieu (I really hate that word), here is the winner, as picked by random.org

And the winner is:


True Random Number Generator  18
Kris said...Great job! 


Send me your address and which store you'd like the gift card to, Kris (Joann's or Michaels). I will get this out to you in the next few days! Thanks for stopping by!

Saturday, October 22, 2011

Fall Blog Hop-Halloween Treat Bag Decor

Hi, all! Carole here, and you are On My Craft Room Wall. You should have hopped here from Debbie's blog. If you didn't, you should start at the beginning at The Bugbytes . Pam is giving away an awesome prize that you do not want to miss the chance to win!

 http://www.thebugbytes.com/
 http://3catsandabug.blogspot.com/
 http://www.scrappinmystressaway.blogspot.com/
 http://nonnasscraps.blogspot.com/
http://cuteandsome.blogspot.com/
http://www.thepapermidwife.com/
http://goodybagdiva.blogspot.com/
http://www.kamscraftyplace.blogspot.com/
http://debseclecticthoughts.blogspot.com/
http://www.onmycraftroomwall.blogspot.com/  YOU ARE HERE!
http://sassyandscrappykate.blogspot.com/
http://www.amysscrappyspace.blogspot.com/
http://milamemories.blogspot.com/
http://sabrioletdesigns.blogspot.com/
http://www.217creations.com/

Now, on to my project. 
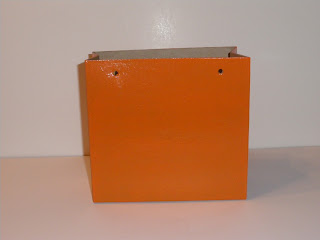
I started with this chipboard gift bag I found last year at Hobby Lobby in the Christmas decor section. I thought it would make a great Trick or Treat bag decorative candy holder.


My first step was to paint it. I purchased two types of orange acrylic paint at Michael's and wasn't sure which to use. I decided I would start with the plain orange paint, top it with a layer of the glitter paint, and see how it looked.

I removed the twine handles to make it easier to paint. I love painting chipboard! (I had to throw that in)  I think chipboard takes paint so well, so I was a bit confused by how sheer this paint looked on my project. I realized after the second coat that I had purchased glossy paint (yes, it took me two coats to realize that) and that was why the chipboard was not absorbing the paint in the manner I was accustomed to. After the third coat, I decided a little of the chipboard color showing through didn't look so bad (right?)

Now I was ready to try out the Glamour Dust glitter paint, which I had never used before. I loved it as soon as the first brush stroke went on! Yay! It was pretty and sparkly and I was very happy with the result!

Time to decorate. I decided to use my Mini Monsters cartridge because I knew it would have the right characters for the look I wanted and I'd only used this cartridge for one other project. I needed to get my money's worth for this cartridge purchase!

I chose <Spooky> with Base shadow, Layer 1 and Layer 2, cut at 3"

And <Gross> with Base Shadow, Layer 1 and Layer 2, cut at 3"

For my letters I used the font from Birthday Cake (this is one of my top 5 favorite fonts to use) cut at 1.25". I cut both the Green and Purple letters the same size (no shadow) and layered the top letter slightly askew to create the shadow look. I had these cute little spider stickers a crafting friend gifted me and I thought they added just the right touch. I had intended on tying the twine handles back on but opted to use black and white grossgrain ribbon instead.

Filled with trick or treat candy, I decided this Trick or Treat bag will be the perfect candy holder come Halloween night! Until then, I have to hide the candy from the candy monsters lurking in my house.
Supplies:
Chipboard gift bag
Paint-Pumpkin Orange Glossy (Plaid) and Orange Glamour Dust (DecoArt)
Cardstock-The Ghosts and Goblins Cardstock matstack (DCWV-love this stack!)
Cartridges-Mini Monsters, Birthday Cake (Provocraft)
Ribbon from my stash. I used black diamond Stickles to accent the eyes.

Well, I need to give away some blog candy, don't you think? Yes, I do. Please leave a comment here with a way to contact you should you be chosen as the winner. I will pick the random winning comment Sunday evening (10/23/2011) at 9:00 pm EDT. The prize will be a $10 gift card to either Michael's or JoAnn's. Winner gets to choose which card they'd like.

Thanks for stopping by!

Now onto my talented friend Kate's blog over at Sassy and Scrappy

Monday, September 19, 2011

Paper Flower Tutorial

Good morning all! Remember the altered bottle I posted last week? Well, I have a tutorial for it this week over at the Chicas Gettin Crafty blog.


Check it out!

Thursday, September 15, 2011

I'm a Winner!

Woo Hoo! I won the Twine blog candy over at Paper Craft Weekend Challenge ! I cannot wait to use it on one of my next projects!

Allison and Caroline host two challenges a week, with guest designers one weekend of each month. Come check it out, and become a follower. The challenges are always just for fun. And we have a great group over there. Hope to see you soon!

Monday, September 12, 2011

Altered Bottle

Here's my project for today's Chicas Getting Crafty Blog post. This was my "anything goes" project. Check out the link for more information!

Sunday, September 11, 2011

Paper Craft Weekend Challenges-Chipboard and Bakers Twine

This weekend at the Paper Craft Weekend Challenge blog, Allison's challenge was to choose chipboard, and Caroline's was to use baker's twine. Since I did not have the time to participate in both challenges, I combined them. Here is my result:
Materials Used:
Chipboard flower, DCWV mat stacks (The Fall Glitter Matstack and Harvest Gathering Matstack), Stampin Up supplies-Very vanilla and chocolate chip cardstock, chocolate chip scalloped edge ribbon, Vintage Labels stamp set, Fabulous Phrases stamp set, chocolate chip ink spot, chocolate chip marker, crushed curry marker (used to color chipboard daisy), really rust button, Daisies # 2 Die, Vintage label punch, Mini word punch; and Martha Stewart Twine.

Card size is A2. Matstack cardstock was cut to create a two patterned card front. Stamped and punched "Smile" label. Threaded ribbon through label and tape to back of cardfront. Chipboard flower colored with Crushed Curry marker and center was sponged with Chocolate chip ink. Leave about 4 inch tail of twine at front of chipboard flower and wrap twine through petal openings going around petal until each opening has twine wraped through twice. You should end with two pieces of twine facing each other. Cut twine so there is now two 4" tails. Thread each piece of twine through button and tie into a bow. Run Chocolate Chip cardstock through die cut machine with Daisies #2 Die. Glue chipboard flower on top of Daisy, making sure you can see the daisy under the chipboard flower. Set aside. Using Chocolate chip marker make stitches around bottom half of card front. Adhere flower to cardfront as show. Adhere completed card front to Very Vanilla card.

Please Call Card


Hello, my friends. Today this card I made is featured on The BugBytes Blog. Please check it out over there for directions and additional snapshots.

Call someone you love today....
Carole

Monday, September 5, 2011

Paper Craft Weekend Challenges-Pt 2

Second challenge of the weekend is from Caroline. She's the glitter girl! Her challenges always involve sparkly things. And if not for that "requirement" my tag probably wouldn't have any sparkle to it. I am not a tag maker, but due to the tag theme we had our monthly crop this month, I decided I would do tags for this week's challenges. I have a friend who's birthday gift will have this tag as an adornment. Everything but the Stickles, the twine,  and the tag base is from Stampin Up.
Particulars: Paper is Nursery Nest (I will never use this paper for anything baby related. It's adorable for lots of things), Penant Punch, Pennant Parade stamp set, Pear Pizzazz cardstock, Marina Mist Satin Ribbon, all mounted on an Avery tag purchased from Office Max.

Paper Craft Weekend Challenges

My good friends Caroline and Allison kicked off their new blog Paper Craft Weekend Challenge this weekend and I decided I needed to participate in their awesome challenges. Here's my first entry:

Allison gave us two sketches for her challenge. The first was a layout (Gosh I wish I had the time to get back into scrapbooking) the second was a card. Since I had to make Christmas tags for the church crop I co-hosted with my good friend Maggie on Saturday, I decided to use the card sketch challenge to make a tag.
All the materials I used for this tag came from a $5 Christmas kit I bought from Big Lots. The "for you" stamps were from the Fabulous Phrases Stamp set from Stampin Up. I made the flower using the Stampin Up 5 Petal Flower punch (punched 3 time). The leaves were also made from the 5 petal punch.  I will have a tutorial on this flower making technique as a Technique Tuesday later in September.


Thursday, September 1, 2011

Press Release-Come Join the fun!!!

Allison (from Goody Bag Diva) and Caroline (from Caroline’s Craftography) are thrilled to announce their new challenge blog – Paper Craft Weekend Challenge!  You can expect a challenge with a project to inspire you every Friday and Sunday. The only rule they expect you to stick to is having fun! The challenges won’t be limited to one type of machine or project – so get your materials and get ready to use your stuff.  There will be some tutorials along the way – and it wouldn’t be any fun if there weren’t friends occasionally stopping by – so please come join them and get ready to get your craft on!


These ladies had the best Circle Member sponsored events on the Circle Board until recently. Well, now they're taking it to the masses. Please stop in, say hi, and participate in a challenge when you can. These ladies, and their followers, are a lot of fun! Come see for yourself. I know I'll be hanging out over there whenever I can. 
Come join me.
Carole


Wednesday, August 31, 2011

Mini Monsters lampost

I finally decided I had to use the Mini Monster cartridge I purchased on a whim.  I am very happy with how this project turned out. The how tos and what fors are listed over at the Passionately Artistic blog. Here's my project:


I love Halloween projects. I can't wait to get started on all of them, Have a happy day!
Carole

Monday, August 29, 2011

Promarker Giveaway and an Anniversary Card

Happy Monday morning, my lovelies! I woke up realizing I'm featured on two blogs today. Holy celebrity! Not really, but I do feel special. I would like to share both of them with you today.

Please check out my 50th Wedding Anniversary card over at Chicas Gettin Crafty and leave a comment for me. There is a contest there for an awesome wedding layout kit that you might want to enter while you're checking out the projects. Just become a follower and link your favorite wedding layout for a chance to win.

Next, check out my review of the Letraset Promarker over at Passionately Artistic. Maggie is giving away a set of 10 Promarkers so please be sure to become a follower and leave a comment. I love these markers and just bought some. You'll be seeing more of my projects using images colored with these markers.

Stay safe and crafty!
Carole

Wednesday, August 24, 2011

Wall Decor at Passionately Artistic

Come over to the Passionately Artistic website to see an incredibly simple Wall Decor project I made. All you need for this project is a Die Cut Image (I used a tree with shadow from the Cricut Zooballoo cartridge), 9 sheets of cardstock and 3 frames. Check it out!

And have a great day!
Carole


Saturday, August 20, 2011

Chance to Win an Imagine!!!!

Hi, everyone,
A good friend of mine from the Cricut Circle is offering the chance to win an Imagine Bundle. It's a very impressive prize package. She is having a drawing to raise money for her two daughters and their families, who lost everything in a house fire not too long ago. Please check out this link Cricut Imagine Bundle prize drawing where you can get details about the prize drawing. There is also a link on that page that will take you to articles about the fire. I hope you will be able to participate in the drawing while helping out a good friend, and loving mother, at the same time. I know your support is very much appreciated.
Thank you,
Carole

P.S. I would like to give my blog followers an extra chance to win a little something. Any of my blog followers who donate to the drawing will also be eligible to win a Smashbook prize package from me. For every donation entry you receive from Kymberlee for the Imagine prize drawing, you will receive the same # of entries for my Smashbook  prize package. Remember, you must be a follower of my blog in order to qualify for the Smashbook prize. Please tell your friends. I'll give you an extra ticket for every friend you refer that becomes a follower of my blog and makes a donation for Kymberlee's prize drawing. Drawing will be held at the conclusion of the Imagine prize drawing. Here's what you can win:

Related Posts Plugin for WordPress, Blogger...