Wednesday, September 26, 2012
Time To Get to Work!
Hello, everyone. Today it dawned on me that I have a lot of plans to make things for people in the coming months and I don't know why I think I have plenty of time to do all these things. This epiphany came to me after seeing that my last Cameo Spotlight Card Challenge post has attracted 15 views and only 1 comment. I'm guessing that means I haven't impressed many with that creation and so why am I spending my time trying to impress strangers, when those near and dear to me love what I do? So, I decided I better start participating in my own personal Challenges.
First personal challenge - I need to make 10 Halloween cards for those I love. I will post them as soon as I finish them.
I hope you will check out my Halloween creations once I post them and leave a comment letting me know you've stopped by.
Love ya!
Carole
Monday, September 24, 2012
Sew On!

Another Cameo Spotlight Challenge card. This time the challenge was to use triangles in our design.
I remembered I had purchased some Silhouette quilting block images and figured there was bound to be some triangles in one of them. I was right. This card was pretty simple to make. The sentiment was done with my Chomas Adjustable pen holder and a black gel pen, and I added some hand stitching using a paper piercer for the holes and some glittery floss. I love to make sewing themed cards. This one will go to my sister in law who is a talented quilt maker.
Supplies:
Green Cardstock-Bazzill
Paper-Vintage Springtime Designer Series Paper-Stampin Up
Green Glitter floss-Sew Easy
Paper piercer, template and piercing mat
Chomas Adjustable pen holder
Gelly roll pen-black
Thanks so much for stopping by !
Carole
Saturday, September 22, 2012
Thank you Cameo Spotlight Challenge Blog!
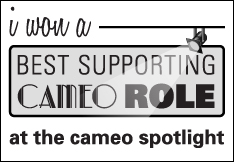
Yay! I won a supporting role over at the Cameo Spotlight Challenge! It was for my Color Challenge card. Thanks for the nod ladies. And congratulations to all the talented designers who participated!
And here is my entry again:
If you have a Cameo and would like to play along, follow one of the links I have on my blog and check out the latest challenge.
See you there!
Carole
Monday, September 17, 2012
Cameo Spotlight Challenge Time
Hello, everyone! Time for another Cameo Spotlight Challenge. This time it's a color challenge!
The challenge was to use Slate Blue/Gray, Sage Green and Beige. And we could also use neutral colors of Black, White and Kraft. I frequently find color challenges difficult, but somehow I managed to use all 6 colors for this card. I won't tell you how long it took me to conceive and execute this card, let's just say it took me a long time and leave it at that. And here it is:
I have to confess that I'm the only person I know that it takes a tremendous amount of effort and planning to create a "simple" looking card. I guess it would be simple to re-create it, and I'll have to settle for that being what makes it "simple".
All of the cuts I used are from the Silhouette store. The card base, rolled flowers, leaves and labels. I thoroughly enjoyed using my Cameo as it cut everything just the way I wanted it to, the first time around. In addition to card stock and Silhouette store images, I used some twine, a couple eyelets and a stamped image for the sentiment. I'm really happy with how this card turned out and I will be giving it to someone I love very much.
Thanks to the Cameo Spotlight Challenge blog for challenging me to play along. And thanks to all of you who have taken the time to look and comment.
Craft on my crafty friends,
Carole
Friday, August 31, 2012
Two Hearts
I created this card for the Cameo Spotlight Challenge #2. The theme is numbers. We can interpret this in anyway we choose. I decided to make a wedding card to have on hand for the next time I need one. When I decided to do a wedding card, I could not get the phrase "Two Hearts Beat as One" out of my head. It is an old U2 song. I recently purchased a wide format printer and decided I should finally hook the thing up and use the print and cut feature for this project.
I typed out "Two Hearts" and "Beat as One" and placed them on a rectangle I created in my Silhouette studio software. I flood filled the words and a bold border with red ink and then print and cut it. I cut two 'wedding couple' images from black card stock and layered them with pop dots. I welded two small hearts together, cut them out of red card stock and adhered them to the wedding couple. I affixed the couple on the card between the words again using pop dots. I put a very, very thin black mat behind the red bordered rectangle. I placed this on a red patterned card stock. I fussy cut a couple heart flowers from scrap card stock and used them as photo corners.
I really like the design despite it's simplicity. I feel it conveys the message perfectly.
Recipe:
Black and red patterned card stock (Stampin Up), white card stock (Bazzil), wedding couple and heart images (Silhouette store), font (Caswallon Demo)
Thanks for taking the time to stop by and looking at my card!
Carole
Tuesday, August 21, 2012
The Chosen "3" Crop Stop Challenge card
Today I'm sharing my entry for the Crop Stop Challenge #85-The Chosen 3. The Challenge was to use flowers, bling and dots-The Chosen 3. I decided to incorporate these items into other design elements I've been wanting to try. The main one being to paper piece a hexagon design using coordinating paper. This proved to be a rather time consuming experiment, which was a welcomed relief to some personal stress I was dealing with that evening. If I were ever to do this again, I would flood fill the shapes with coordinating designs using my Silhouette software, and just cut the whole patternered piece as a card front. But for those of you that love a paper piecing challenge, here's the results of my planning, cutting and gluing each piece:
I found another sheet of cardstock from the stack and fussy cut flowers that were part of the pattern. I added some small, matching paper flowers I had in my stash (this is the flowers portion of the challenge) and then added yellow rhinestones and sparkly self adhesive dots to the center of the flowers (this is the bling and dots portion of the challenge). I finally added a dragon fly a good friend had made for me several months ago to the whole embellished strip. I felt the hexagon shapes looked kind of blah, so I outlined them with Diamond stickles.
There are a lot of nice entries over at the Crop Stop Challenge. Do yourself a favor and check them out.
Carole
Supplies: The Mango Frost cardstack (DCWV), Stickles-Diamond, Twine (from a twine share so I'm not sure if it came from The Twinery or Divine Twine), paper flowers, sparkly dots and bling from my stash; dragonfly embellishment made for me by Pam Ramesh.
Tools-Silhouette Cameo, Silhouette Designer Edition Software, Hexagon shapes image from the Silhouette Online store, Petal roller (Imaginisce)
Labels:
bakers twine,
bling,
card,
Crop Stop Challenge,
dragonfly embellishment,
flowers,
hexagon
Tuesday, August 14, 2012
Ornate Frame card
I love my Cameo. Yes, I may have stated that a few times before, but just in case there are a few newbies here, I needed to say it again.
I made this card using two different image types I purchased from the Silhouette store. The first was the Ornate Card Frame (regular cut) image. The second was a Daisy (sketch) image I wanted to add to the frame portion of the card. Here is how I combined the elements:
First, I placed the card layers on my virtual mat. I used the default size as it was perfect for the 5-1/2 X 5-1/2 inch envelopes I have.
Then I chose a Daisy sketch image and sized it so it would fit inside the ornate frame. I placed it on my mat inside the frame. (sorry for the blurry picture, but I was too lazy to take another picture and you get the idea)
Next I moved all the images off the virtual mat except for the Daisy sketch.
I changed out my blade housing for my Chomas Adjustable pen holder. I set a black gel pen in the holder following the pen holder instructions and attached white cardstock to my "real" mat. I changed my setting for the Silhouette pen and pressed cut. When finished I had the sketched Daisy image on my cardstock. DO NOT UNLOAD your mat!
After creating the sketch, I moved my frame portion of the card image back to the virtual mat, placing it around the Daisy sketch and I moved the Daisy off the virtual mat.
I changed my adjustable pen holder for the blade housing, changed the settings and pressed cut. The Cameo cut the frame perfectly around the sketched Daisy.
I chose a patterned cardstock for the card base, and because my cardstock was flimsy, I opted to cut another card base out of black solid cardstock to make it a bit more stable. I cut the black base along the perforations and adhered the separate pieces to the inside of the card. I also used black cardstock for the outer shadow portion of the frame. I adhered the white frame pieces over the black frame piece, and adhered that to the card base. All in all it was very simple to put together.
I wanted to embellish this card, but honestly the design was so pretty that to add anything to it seemed to take away from it's beauty. So, I added 4 pieces of self adhesive bling to the frame and colored the inside of the Daisy with a coordinating Copic marker color. This satisfied my need to add a little something to the card without overdoing it.
Supplies I used: Cameo Die Cutting Machine, Chomas Adjustable Pen Holder, Black gel pen (I used a Gelly Roll gel pen), Black cardstock (Stampin Up), White cardstock (Bazzill), Patterned cardstock (Me and My Big Ideas), Black Bling (want 2 scrap), Copic Marker (YG03), Scotch Quick Dry Adhesive, ATG Tape
Have some fun adding sketch designs to a card base. There are a lot of card bases available in the Silhouette store, as well as sketch designs. If you have the Designer Edition of the Silhouette Software, you can turn any image into a Sketch. Give it a whirl!
I posted this one over at The Cameo Spotlight as well (I was told it was okay :). You all should check it out and play along with the Summer Theme challenge. It's so easy and fun!
Let me know what you think and have a great day!
Carole
I made this card using two different image types I purchased from the Silhouette store. The first was the Ornate Card Frame (regular cut) image. The second was a Daisy (sketch) image I wanted to add to the frame portion of the card. Here is how I combined the elements:
First, I placed the card layers on my virtual mat. I used the default size as it was perfect for the 5-1/2 X 5-1/2 inch envelopes I have.
Then I chose a Daisy sketch image and sized it so it would fit inside the ornate frame. I placed it on my mat inside the frame. (sorry for the blurry picture, but I was too lazy to take another picture and you get the idea)
Next I moved all the images off the virtual mat except for the Daisy sketch.
I changed out my blade housing for my Chomas Adjustable pen holder. I set a black gel pen in the holder following the pen holder instructions and attached white cardstock to my "real" mat. I changed my setting for the Silhouette pen and pressed cut. When finished I had the sketched Daisy image on my cardstock. DO NOT UNLOAD your mat!
After creating the sketch, I moved my frame portion of the card image back to the virtual mat, placing it around the Daisy sketch and I moved the Daisy off the virtual mat.
I changed my adjustable pen holder for the blade housing, changed the settings and pressed cut. The Cameo cut the frame perfectly around the sketched Daisy.
I chose a patterned cardstock for the card base, and because my cardstock was flimsy, I opted to cut another card base out of black solid cardstock to make it a bit more stable. I cut the black base along the perforations and adhered the separate pieces to the inside of the card. I also used black cardstock for the outer shadow portion of the frame. I adhered the white frame pieces over the black frame piece, and adhered that to the card base. All in all it was very simple to put together.
I wanted to embellish this card, but honestly the design was so pretty that to add anything to it seemed to take away from it's beauty. So, I added 4 pieces of self adhesive bling to the frame and colored the inside of the Daisy with a coordinating Copic marker color. This satisfied my need to add a little something to the card without overdoing it.
Supplies I used: Cameo Die Cutting Machine, Chomas Adjustable Pen Holder, Black gel pen (I used a Gelly Roll gel pen), Black cardstock (Stampin Up), White cardstock (Bazzill), Patterned cardstock (Me and My Big Ideas), Black Bling (want 2 scrap), Copic Marker (YG03), Scotch Quick Dry Adhesive, ATG Tape
Have some fun adding sketch designs to a card base. There are a lot of card bases available in the Silhouette store, as well as sketch designs. If you have the Designer Edition of the Silhouette Software, you can turn any image into a Sketch. Give it a whirl!
I posted this one over at The Cameo Spotlight as well (I was told it was okay :). You all should check it out and play along with the Summer Theme challenge. It's so easy and fun!
Let me know what you think and have a great day!
Carole
Subscribe to:
Posts (Atom)